Today Is National Ice Cream For Breakfast Day!
Take advantage and enjoy a frozen treat this morning!

Take advantage and enjoy a frozen treat this morning!
Video doorbells have become more and more common the past couple years, with many different companies joining the competition. It can be difficult choosing the right doorbell for you. In this post we will outline the current most popular video doorbells available. Hopefully by the end of this blog, you will know which doorbell is right for you!


At the time of this writing, these are the highest rated video doorbells currently available. We think each of them has their own advantages and are definitely worth a look! Smart doorbells increase the security at your home and can provide great peace of mind. If you really want a video doorbell, but don’t yet have a place to put one, give us a call at (970) 507-8655 or come visit us in the office! We would love to help you find your Next Home!
With snow falling every other day, and many businesses still closed due to Covid-19, it’s a great time to get some sledding or tubing in! If you are in Pagosa Springs, or are planning a trip up, sledding is a fun way to pass the time! Sledding involves a lot of time rolling around in the snow; so you really need good waterproof snow gear including gloves and a warm hat. We also recommend proper snow boots, no one wants wet feet! As far as sleds go, there are several styles to choose from, and you really can’t go wrong with one or another!

Below is a quick rundown of the sled types and how they function:
We have compiled a small list of the best public spots in Pagosa Springs to go sledding! If you don’t see your favorite spot, reach out to us and we will add it to the list!
Pagosa Springs is like a snowy wonderland. You could spend all winter sledding, snowboarding or skiing, snowmobiling, snowshoeing, and more! Hopefully this post has given you a good idea of where to start! If you are looking for a vacation rental, or something more permanent, give us a call at (970) 507-8655! Don’t forget to like us on Facebook for NextHome RMR updates and virtual open house videos! Humans Over Houses is our motto.
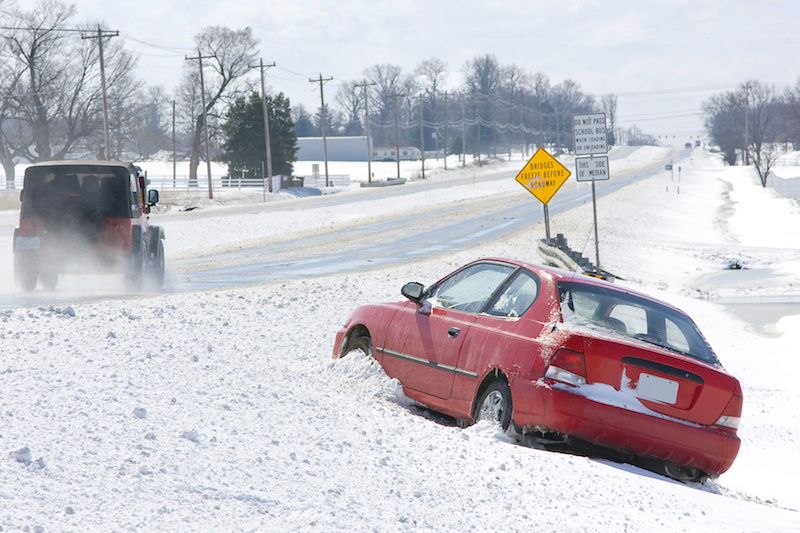
If you live in an area where it snows, you have probably seen someone who has slid off the road. Maybe you have yourself! Winter driving can be tricky, but with the proper knowledge you can significantly reduce the amount of mistakes you make the next time you find yourself in a slick situation!

Here are some tips that we think will help you drive safely this winter:
Drive Smoothly! – This first step is a simple one. Driving smoothly and deliberately will reduce your risk of losing traction. Jerky movements of the steering wheel, gas pedal, or brakes can be enough to break your tires free of traction; causing serious problems. Drive like you have a bowl of hot soup filled to the brim on your dashboard!
Stay Back – The less traction you have, the harder it is to stop! If you are driving around other cars you need to stay further back then you would in normal conditions. You need to give yourself enough space to make an emergency stop if needed. The rule of thumb for this is to double your following distance in wet conditions, triple it in snow, and at least triple your distance in icy conditions! This will also give you more time to slow down for turns, which need to be taken extra slow in these conditions.
Watch Your Instrument Cluster! – If you aren’t already in the habit of keeping an eye on your instrument cluster, you should be! There are several important warnings that can show up here. The one we are focusing on however, is the Stability Control Light. This handy little amber light will flash anytime your wheels lose traction, notifying you that you should probably let off the gas or ease up on the brakes! If you accelerate hard, you will probably see this light, indicating that your wheels are spinning. It is very important when driving in the snow that you ease onto the gas when accelerating from a stop.
Look Where You Want To Go – This one is important! If you feel your car beginning to slide, NEVER look in the direction it’s sliding! You always want look in the direction you want to go. Most of the time, you will end up where you are looking. This is a rule that even race-car drivers follow to pull out of a skid!
These are just a few of the best tips for driving in winter weather conditions! We hope you have enjoyed this blog. If you’ve followed all the advice in this post and still find yourself stuck in the snow, check out our post on getting unstuck here! If you enjoyed this post and want more NextHome Rocky Mountain Realty & Rentals content, like us on Facebook!
If you have recently switched to remote work, you may have been shocked by the level of noise in your home every day. You aren’t alone! Workers all across the country are realizing their homes aren’t the peaceful workspace they hoped for. Whether it be the sound of traffic outside your home or kids in it, there are many options to reduce noise levels to increase your productivity!

In today’s post we will be covering some of the most common and effective solutions to noise pollution at home:
We hope this post has given you some insight on sound-proofing your home for remote work, or simply for a quieter space! If you have any questions about our blog, or you would like to talk to a Southwest Colorado real estate professional, give us a call at (970) 507-8655. Don’t forget to like us on Facebook to stay up to date on our virtual open house series and NextHome RMR updates!
The New Year has been a sunny one in Pagosa Springs so far. One great place to enjoy the sun is on Wolf Creek! Every trail is open and there is snow in the forecast for this weekend. If you don’t have a pass already, they are available on Wolf Creek’s website here or in-person on the mountain! Season Passes are available as well as day passes. If you want to scope things out before heading up the pass, check out the Wolf Creek Live Webcams. They offer multiple angles of the ski area!

Don’t forget to wear layers and bring food and water with you, they’re are especially important at higher elevations. If you need snow gear, both Ski & Bow Rack and Summit Ski & Sports offer deals on tons of sport and outdoor equipment! If Wolf Creek has you hooked on this area, give us a call at (970) 507-8655 and we can help you find your dream property!
Getting pre-approved for a mortgage is the first step in the home buying process. This will allow you to know how much you can spend, and much you need to save for a down-payment. Many realtors require pre-approval before showing homes.
From start to finish, buying a home takes roughly 10-12 weeks. This number may change depending on several different factors. In hot markets, it may take longer to close than when the market is slow.
In a seller’s market, there is more demand than supply. This means multiple people are competing for the same homes, driving home prices up. This benefits the seller as more people want to buy their home.
In a buyer’s market, there is more supply than demand. This means buyer’s have more property to choose from, and will probably pay less for a home because there isn’t much competition. This benefits the buyer because they can take their time and possibly find a better deal on the perfect home.
A stratified market happens when market characteristics change based on price point. It may be a seller’s market for homes over $500k but a buyer’s market for everything under that $500k mark. This often happens when international investors decide to park their money in the U.S. by purchasing high-end real estate.
Home shoppers pay very little, if anything. For most sales, there are two real estate agents; a listing agent and a buyer’s agent. The listing agent represents the seller and is in charge of listing and marketing the property. When a home is sold, a percentage of the sale that is negotiated in the contract, is paid to the listing broker. The broker then pays the buyer’s agent their cut from that money. So buyer’s usually don’t have to pay the commission.
Most lenders require a FICO score of at least 620 to be eligible for a mortgage. Borrowers with higher FICO scores pose less of a risk to the lender; these borrowers will probably secure a lower interest rate. If you have a lower credit score you may need to bring more money for a down payment, or accept a higher interest rate to offset the lenders risk.
The national average down payment is 11% of the purchase price, this number may fluctuate however. Several first-time home buyer programs allow a down-payment as small as 3-5%. An FHA loan only requires 3.5% down. If you are former or active US Military, you may be eligible for a VA loan that doesn’t require a down-payment at all! It is smart to shop around and look into different lending options to see which works best for you.
When you are ready to make an offer on a property your agent will ask for a check or cash to go with the offer. This check, called an earnest money check, demonstrates to the seller that you are serious about your offer and you are ready to continue with the deal. The money is kept in a trust account and is applied to the down-payment or closing costs at closing. If the deal falls through, the buyer receives the money. Earnest money essentially takes the property off the market and reserves it for you.
If you plan on using the equity you have built in your current home as the down-payment for your new home, you will need to sell the current one first. If you plan on using your current home as an investment property, your loan advisor will need to confirm your ability to purchase a new home before doing so. If you are relocating to take a job with your current employer, reach out to see if relocation assistance is available!
Written offers have an expiration date filled in. Typically, you will hear back within 24-48 hours of sending the offer.
Definitely! Purchasing a home is one of the biggest investments most people will make in their life. Getting a home inspection will insure you are not buying a home with major structural damage or other issues. If you are using a VA or FHA loan, you will be required to get your home inspected prior to purchase.
Radon is a colorless, odorless gas that emits from decaying uranium in the ground. It can seep into a home many different ways; from the basement, crack in the foundation, electrical outlets, etc. Radon can cause lung damage and may increase the risk of lung cancer. The EPA recommends that all homes be tested for radon at the point of sale. This test can usually be rolled in with your inspection. If the test shows higher-than-safe levels of radon, there are several techniques to adequately ventilate the area to bring the levels down. Consult your local radon experts on the best method for your home. This remediation costs roughly $1200, which isn’t too bad when you consider a new furnace can cost triple that!
To get pre-approved for a mortgage, you will need five things.. First is proof of income. Usually, you will need to provide W2 wage statements from the last two years, as well as recent pay stubs, proof of any additional income, and tax statements from the previous two years. Next, you will need proof of assets. These include current bank statements and investment account statements to show that you have cash reserves available to fund your down-payment. Third is good credit. As we stated above, you will usually need a FICO score of at least 620 to be pre-approved for a mortgage. The higher your credit score, the lower your loan interest rate will be. Next up is employment verification. Your lender will need to verify your current employment to ensure you have a steady income. If you have changed jobs recently, the lender may need to call your previous employer. Stable work history is important to obtain a loan. Lastly is other documentation. Lenders will require other documentation such as the borrowers driver’s license, social security number, and signature in order to pull a credit score.
While not required, a final walk-through is a great idea! Walk-throughs give you a chance to look over the home one last time to make sure nothing has changed before you close. This is also the time to confirm any repairs that were requested have been completed.
This questions has many different answers. When you should sell your home depends on the market in your area, your home, and how much you want to make. Most agents will agree that Spring is the best time to sell, however in some areas Winter or Fall may blow spring out of the water for house sales. Talk to your agent about when the best time to sell YOUR home is!
By the time the first potential buyer enters your home, it should be sale ready! The first thing you should do to prepare your home is clean it! No one wants to buy a dirty home. Once your home is clean, you should go through and repair everything you can; broken door handles, blinds, paint touch-up, etc. Anything that is obviously broken should be repaired. Next you will want to stage your home for pictures. See our Home Staging Post for more info on how to do that! Lastly, you need great photos! Many real estate agents (including NextHome’s NextHomies) will have a professional photographer take photos of your home. Great photos will draw buyers in that may not have given your home a second look otherwise. In this day and age, visual media reigns supreme!
Absolutely Not! Many real estate listing websites provide an estimated list price for the listed homes. This price only accounts for square footage and bedroom/bathroom count! It does not take into account your area, home features, current market, comparable properties in the area, or area of land. Your real estate agent should be able to give you a comparable market analysis that shows you what your home is worth in the current market, as compared to other similar properties near yours! You cannot rely on a “Zestimate” or any other online estimator for accurate results.
As stated above, your real estate agent will perform a comparative market analysis to determine the value of your home. This compares homes, active and sold, based on several criteria to determine how much your home is currently worth in your area.
While it may be tempting to price your home higher than suggested, it could actually deter buyers who would otherwise pay the price you really want for your home! If your price is too high, you won’t have as much interest in your home. This means it will sit for longer, which could scare even more buyers off! We recommend staying as close to your CMA (comparative market analysis) value as you can to ensure a quick sale!
If you are on the buying side of the transaction, you probably won’t have to pay any commission! If you are on the selling side, the commission you pay is negotiated in your listing contract. The national average real estate commission is 6%, but this is negotiable! It is smart to stick with the average commission rates, as buying agents will be less likely to want to show your home if their commission is smaller!
The length of the listing contract varies from agency to agency, and realtor to realtor. Typically, they last between three months to a year! These contracts will always have an expiration date.
This is something we are asked quite a bit. NextHome takes pride in being one of the most technologically advanced real estate companies. We distribute all of our listings nationally across hundreds of websites, so your property gets the exposure it needs for a quick sale! We also advertise listings on multiple social media platforms, print ads, virtual open houses, and in the windows of our offices! Every listing is sure to get tons of exposure on many different platforms.
Once a home is under contract, a buyer has the right to order a home inspection to determine the condition of the home and any repairs that may need to be made. The inspector will go room to room throughout the house, looking for any damage or hazardous issues that need to be addressed in the home. The inspector will go around the outside of the house and even the crawlspace if you have one. In many cases, the inspector will leave a radon test behind, to be picked up 24-48 hours later.
When selling your home, honesty is always the best plan. Some states require a property disclosure form to be filled out; outlining every issue known to the buyers regarding the home. As long as you disclose material facts about the property, you should be fine!

With winter in full force and Christmas nearly here, many of us are braving the snowy roads and icy parking lots. Whether you’re driving cross-country to see family, or driving down the road for groceries, you are likely going to encounter some bad road conditions! If you’re losing traction in the grocery store parking lot or stuck in a foot of snow, this guide should help you get out!
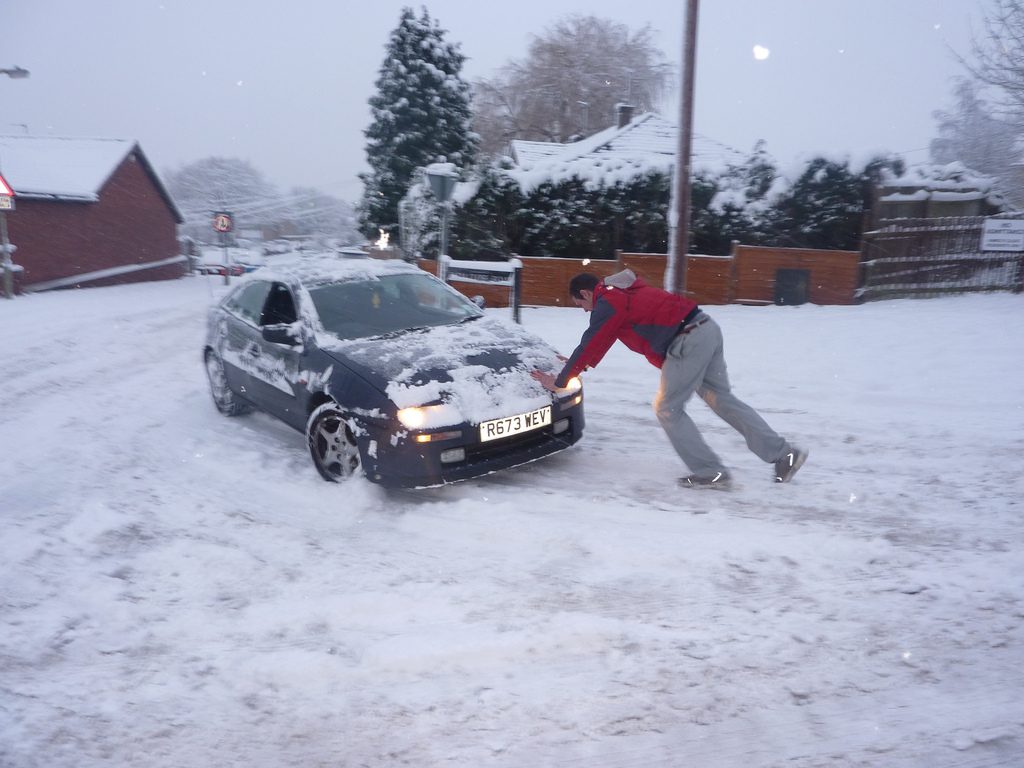
If you are slipping or sliding on or off the road, don’t stop! If you keep your momentum up there is a good chance you will be able to drive away! If you stop you are much more likely to become stuck in the snow.
Throttle control is extremely important when trying to get un-stuck. If you use too much power, you will spin your wheels and dig deeper into the snow. Spinning wheels can also turn the snow into ice, which isn’t ideal for traction! A light foot is a necessity when trying to get out of the snow.
If you are in a vehicle with an automatic, shift to the lowest gear possible. If you are in a vehicle with a manual transmission, shift to 3rd or 4th gear. Doing so will allow you to more easily control your tire movement and minimize wear to your car.
As counter-intuitive as it may seem, traction control won’t help you get unstuck! Traction control works by applying the brakes to whichever wheel has the least traction. This limits your control over the vehicle and can actually keep you from driving out of the snow! If your vehicle has traction control, you can turn it off by pushing or holding the traction control button. Be careful not to apply too much power with traction control off or your tires will just spin. See “Easy On The Throttle.”
Rocking your vehicle back and forth can help propel it out of a rut. Simply drive forward as much as you can, then put the car in reverse and move backwards. Repeat this step to build momentum and get unstuck! If you feel the car get over the rut, you can give it some gas to power out of the snow.
If you are stuck it is probably too late to put tire chains or cables on your car. That doesn’t mean you’re out of options! Small rocks, sand, kitty litter, and even small branches can be placed under the tires to add some grip. There are also traction boards available that work great for adding traction; they work as a makeshift shovel too!
If you simply don’t have enough traction to get moving, deflating your tires by a few PSI may help! When you let air out of your tires the contact patch between the tire and ground increases. This means you have more tread on the ground to add traction! If you keep your wheels straight with the tires aired down, there is less resistance so your car will move easier. Keep in mind that you will need to re-inflate your tires soon after getting unstuck or you risk damaging them. Several companies make portable air compressors for this application!
Sometimes there is simply too much snow to drive through. When this is the case a proper shovel is your friend! There are several portable shovels available, many with collapsible handles for easy storage. These will come in very useful for unburying axles and clearing the underside of your car in deep snow. You can also use a shovel to build a ramp in the snow if it’s too deep for your car!
If these tips just aren’t working in your situation, it’s best to either phone a friend or call a tow company for help! Remember to always check your tailpipes as a blockage could force exhaust gases into your vehicles cabin. If you find yourself in a situation where you’re waiting for help, break out your Winter Emergency Kit to stay warm and cozy! While you’re waiting, check out our Featured Listings, or like us on Facebook to see our Virtual Open House videos and other important updates!
Driving in snow can be unpredictable and sometimes dangerous; 17% of all car accidents occur in winter weather conditions! It is important to be prepared for whatever is thrown your way, whether you hit ice and slide into a ditch or your car breaks down. We recommend keeping a basic emergency kit in your car at all times so you are prepared if something happens. This list covers the basics on what you need!
This list should give you a good base to build your own emergency kit from! Winter driving can be treacherous so we hope this kit can help you this winter season! If you are reading this wishing you lived somewhere snowy, give us a call at (970) 507-8655 and we can help you find your Next Home in the mountains! Don’t forget to like us on Facebook for NextHome updates and our bi-weekly virtual open house series.